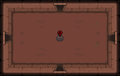
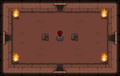
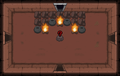
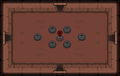
Treasure Room
![]()
![]()
![]()
![]()
![]() with
with ![]() Devil's Crown
Devil's Crown
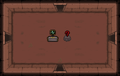
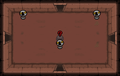
A Treasure Room, or Item Room, is a room that contains items from the Treasure Room item pool. They appear in chapters 1, 2, and 3 (and 4 if Isaac holds ![]()
![]() Bloody Crown, 5 with
Bloody Crown, 5 with ![]()
![]() Holy Crown or
Holy Crown or ![]()
![]() Wicked Crown). Two also appear in the
Wicked Crown). Two also appear in the ![]()
![]() ???. A Treasure Room can be identified by the gold edges of the door. When the current floor is under the effect of
???. A Treasure Room can be identified by the gold edges of the door. When the current floor is under the effect of ![]() Curse of the Labyrinth, making a floor an XL floor, there will be two treasure rooms on the floor instead of one.
Curse of the Labyrinth, making a floor an XL floor, there will be two treasure rooms on the floor instead of one.
Treasure rooms on the first floor of any run do not require a key to open, even under the effect of Curse of the Labyrinth. Treasure Rooms never border more than a single regular room, but there may be a ![]() Secret Room adjacent to it.
Secret Room adjacent to it.
![]() In Greed Mode, Treasure Rooms appear in Chapters 1, 2, 3, 4, and 5, and are always locked. Silver Treasure Rooms appear next to these rooms, they give items from the Boss Room item pool but are always unlocked.
In Greed Mode, Treasure Rooms appear in Chapters 1, 2, 3, 4, and 5, and are always locked. Silver Treasure Rooms appear next to these rooms, they give items from the Boss Room item pool but are always unlocked.
Variations
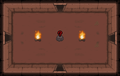
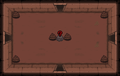
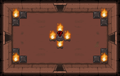
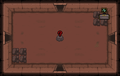
 There is a rare chance that a treasure room might contain two items, only one of which can be taken.
 Golden Horse Shoe will increase the chance for a treasure room to become a double treasure room, and
  More Options will cause every treasure room to become a double treasure room.
 Treasure rooms in
  Downpour,
  Dross,
  Mines,
  Ashpit,
  Mausoleum,
  Gehenna, and
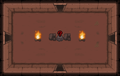
  Corpse will always contain two items. One item will be hidden with a
  Curse of the Blind effect.
- Treasure rooms may contain a
 Shop Restock Machine, allowing Isaac to re-roll offered items if he has coins or bombs.
  There is a chance that 2-3
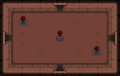
  Greed Gapers may appear in the room.
- There is a chance that 2
 Bulbs may appear in the room.
  Treasure rooms can also rarely contain two items that can both be taken or
  Poop, a trinket, and a couple of pickups instead of an item, though these are very rare occurrences.
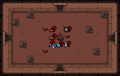
- If a Treasure room on the alt path spawns with an extra item, it will have three items. One can be taken freely while the other two are still a choice. There is no visual indication which is which, although one of the choice items is still hidden.
- On the alternate path, the rare, bad treasure room layouts without an item may contain a
 Beggar, a
  Key Master, a
  Bomb Bum, various pickups, or chests, depending on the current stage.
Layouts
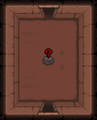
Standard
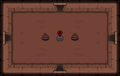
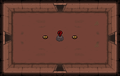
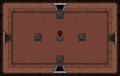


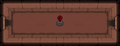


(Very Rare) 
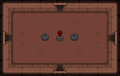
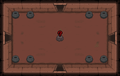
(Rare)


Double Items


| Unlocked | Boss Room |
Mini-Boss Room |
Curse Room |
Sacrifice Room |
Closet |
Grave Room |
|---|---|---|---|---|---|---|
| Locked | Treasure Room |
Shop |
Library |
Planetarium |
||
| Slotted | Arcade |
|||||
| Barred | Challenge Room |
Boss Challenge Room |
||||
| Double-locked | Vault |
Dice Room |
||||
| Double-boarded | Clean/Dirty Bedroom |
|||||
| Hidden | Secret Room |
Super Secret Room |
Crawl Space |
Black Market |
I AM ERROR |
Ultra Secret Room |
| Post-boss | Devil Room |
Angel Room |
Boss Rush |
Blue Womb Entrance |
||